Painting Horse Hair Step by Step
Horse hair looks complicated at first glance, but with the right brushes and a clear approach, it's surprisingly simple to paint realistically.
3 min read
Introduction
Painting horse hair is much easier than it seems at first. Digital art in particular now offers plenty of tools that make the process easier.
My first attempts were made back then with GIMP and simple hair stamps, often generated from photographs. Those worked fine for photo manipulation, but were only somewhat suited to digital paintings. Modern brushes offer far more possibilities today and let you make hair look quick to paint and natural at the same time.
Finding the right brush
One of the most common questions is: which brush works best for realistic hair?
For a long time I used various brush sets from DeviantArt, before I started creating my own brushes. Custom-made brushes save a lot of time and fit your own style better.
Some resources worth checking out:
- V.2 Dynamic Hairy Brushes by arrsistable
- Dynamic Mane and Hair Brushes by Loonaris
- Painting Brushes by RaSen
- Hair Texture Brush by Muse-of-Stock
Useful search terms include:
- hair brush
- hairy brush
- fur brush
- hair texture brush
- dynamic hair
What matters most is a recognizable structure in the brush itself. That makes hair and fur look noticeably more natural.
Painting horse hair – step by step
The following workflow shows how I build up a tail.
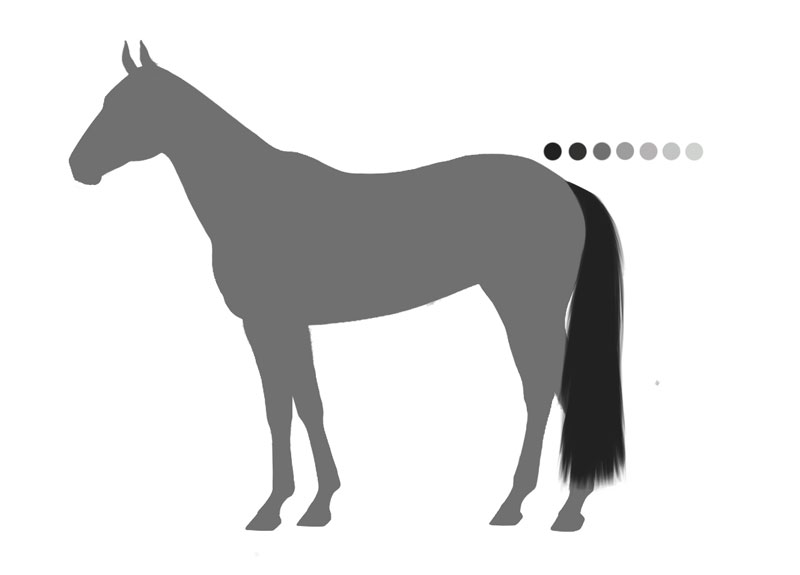
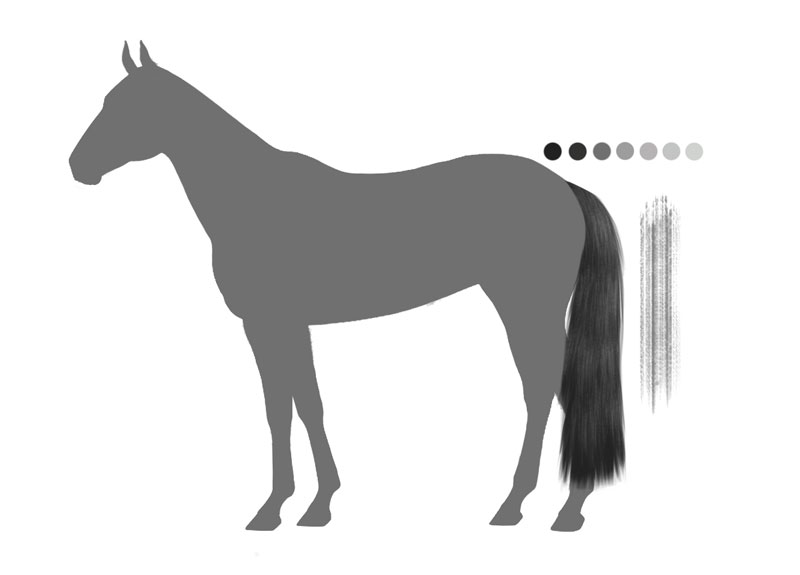
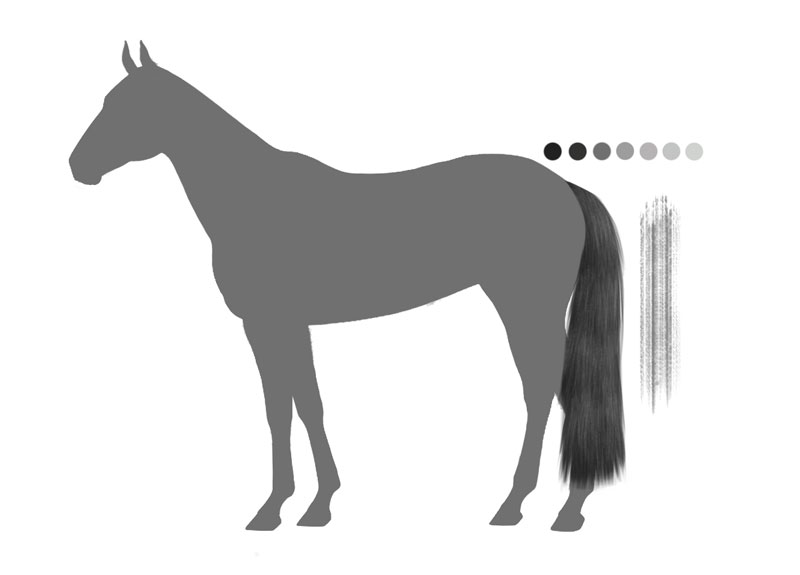
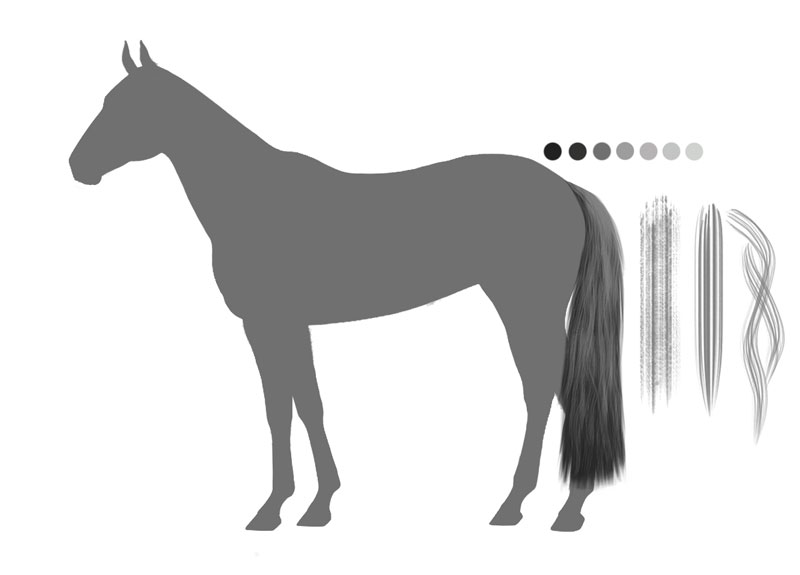
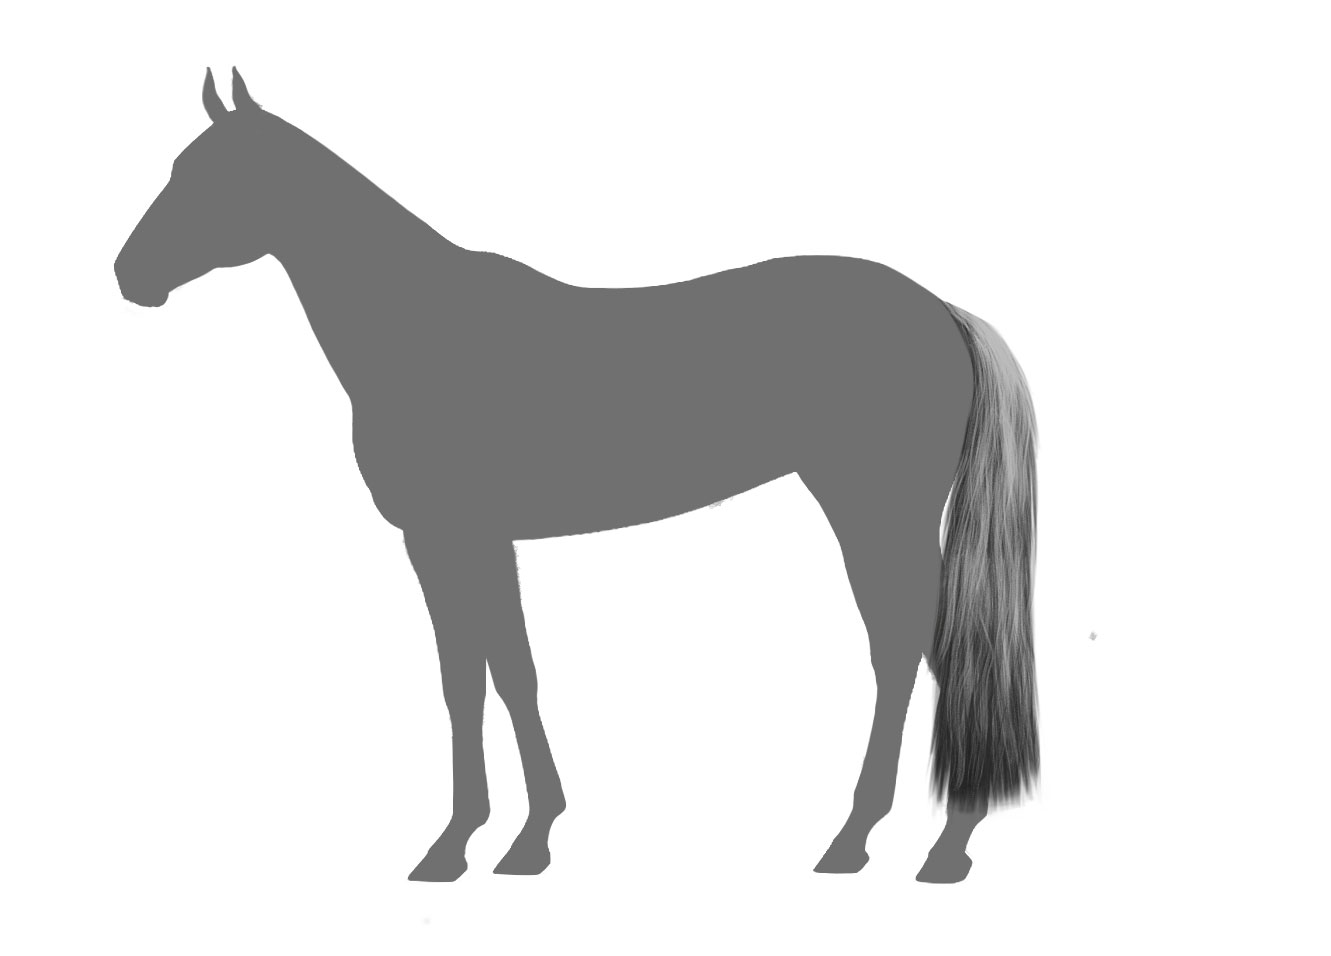
1. Sketching
Create a new layer and roughly sketch the shape of the tail. The sketch is only meant as orientation and doesn't need to be perfect.
2. Setting up the silhouette
Lower the opacity of the sketch and create a new layer. Trace the shape cleanly and fill it in until you get a solid, closed silhouette.
3. Working with masks
Create another layer and work with a mask of the silhouette wherever possible. That way, every following brush stroke stays within the shape.
4. Creating the basic structure
Now a textured hair brush comes into play. Using a slightly lighter color, the first strands are laid in.
The rule here: work rather conservatively. The actual details come later.
5. Placing highlights
Next, a lighter shade is used to highlight individual areas. These highlights later serve as orientation for further refinement.
6. Blending transitions
A mid-tone is used to soften strong contrasts a little. The goal is a more natural look, rather than a tail that feels artificial.
7. Adding details
Now finer brushes come into play.
- emphasize individual strands
- accentuate key light edges
- use different stroke directions
- don't overdo it
Surprisingly few strokes are often enough to create convincing detail.
8. Adjusting exposure
Finally, the exposure is adjusted to match the final image.
If you plan to colorize later, it helps to work with lighter shades of gray. Extreme brightness corrections can make uneven brush texture visible.
Final tips
Don't get hung up on the sketch
A sketch is just a tool. Invest your time in light, shadow, and shapes instead.
Work with layers
Create new layers after important intermediate steps. That way, changes can always be traced or undone.
Less is more
Too many light strands quickly start to look unnatural. Subtle accents often achieve the better result.
Paint with intent
Don't place brush strokes randomly. Deliberately think about where light hits and where shadows form.
Use suitable brushes
Avoid drawing every single hair by hand. Textured brushes create more natural results and save a significant amount of time.
Don't give up
This tail wasn't created on the first try either. Good results are often the outcome of many small experiments and adjustments.
Conclusion
Realistic horse hair doesn't come from countless individual strokes, but from a combination of good brushes, clear shapes, lighting, and deliberately placed detail.
With a bit of practice, you quickly develop a feel for which areas should be emphasized and where less really is more.
Have fun experimenting!
Jackie