Tips & Tricks: Drawing With Guide Lines
Guide lines are one of the simplest yet most effective tools for improving proportions and anatomy when drawing horses.
3 min read
Today it's about one of the most useful tricks for drawing horses: guide lines.
Especially with reference photos, mistakes creep in that are barely noticeable at first glance. This affects leg length or a horse's topline particularly often. In the photo everything looks correct, but in the drawing it suddenly feels off.
Why do these mistakes happen?
In photos, many horses aren't standing on perfectly level ground. Small differences in elevation are often masked by perspective, background, or camera angle.
When drawing, though, we often leave the ground out entirely. Suddenly it looks as if the legs are different lengths, or as if the horse isn't standing anatomically correctly.
Our brain automatically fills in information from the photo. As soon as that information is missing from the drawing, proportion errors become visible.
Accidentally drawing a "downhill-built" horse
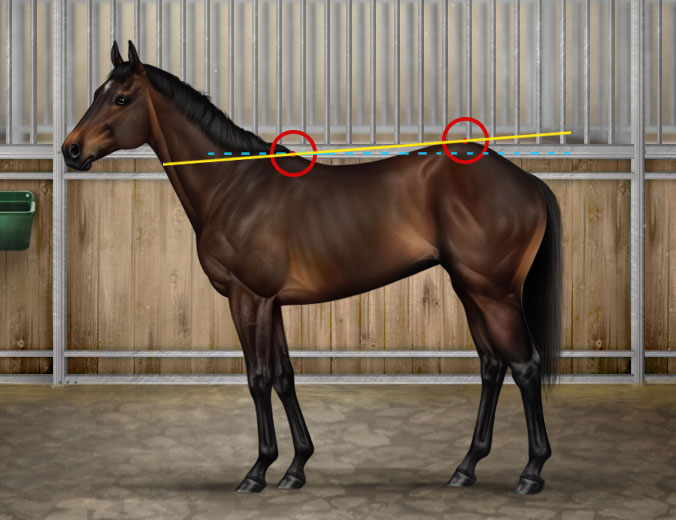
A typical mistake is what's sometimes called an "uphill-croup" or downhill-built horse.
Here, the croup ends up higher than the withers. While this body type does occur in reality, in many drawings it happens unintentionally, due to flawed proportions.
The result:
- the topline looks off
- the horse appears unbalanced
- a sway back gets visually exaggerated
- the overall anatomy loses credibility
Be careful when drawing freehand
The more freely you work, the faster these mistakes can happen.
The reason is simple: if you're not yet practiced at spotting proportions precisely, small deviations often go unnoticed across many working steps.
That's why it's worth sketching in a few orientation lines before the very first brush stroke.
The golden rule: work with guide lines
Guide lines aren't a sign of inexperience. On the contrary — many professional artists use them deliberately to check proportions.
Especially helpful are:
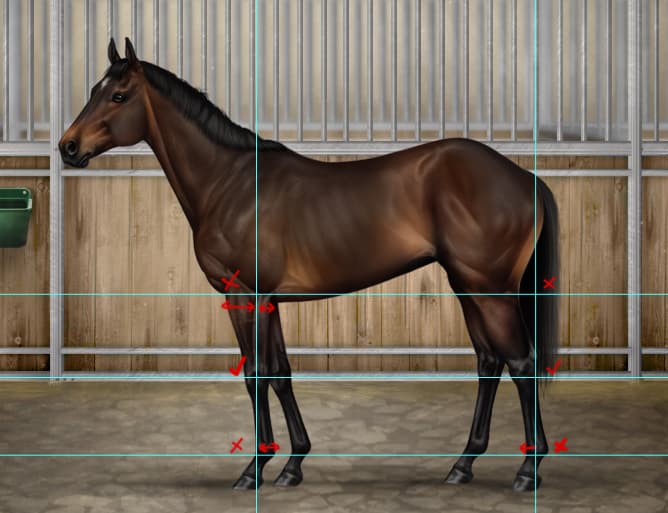
- horizontal lines for joints
- horizontal lines for hooves and ground contact
- vertical lines for overall height
- guide lines along the topline
Even finished sketches can be checked after the fact.
For example, draw a horizontal line along the front legs and check whether the other legs reach the same height. Small deviations immediately stand out this way.
Guide lines for the back
Another important check concerns the horse's topline.
Draw a guide line from the withers toward the croup. This lets you quickly see whether the hindquarters accidentally sit higher than the front part of the back.
This also lets you assess:
- how much the back dips
- whether the topline flows harmoniously
- whether withers and croup relate to each other believably
Especially with complex perspectives, this simple check can save a lot of later corrections.
Using guide lines digitally
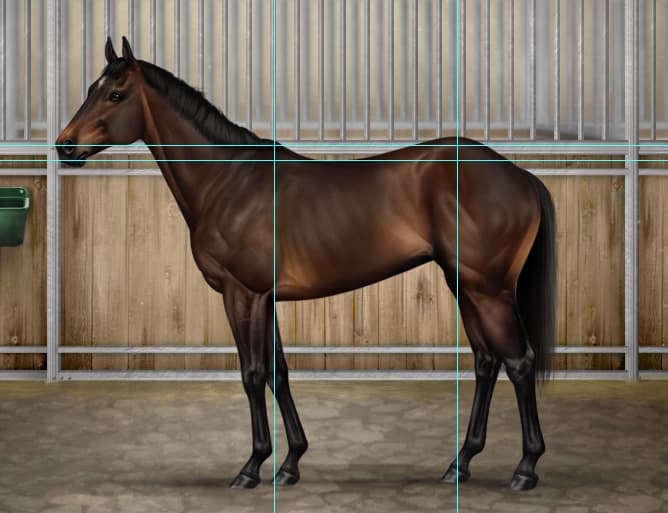
Guide lines can be used easily in almost every drawing program.
Many programs offer:
- rulers
- grids
- guides
- perspective aids
Alternatively, you can simply create an extra layer and draw all your guide lines there. Once the sketch is finished, the layer is hidden again.
The first step toward better anatomy
Guide lines don't solve every anatomical problem. But they help you objectively check basic proportions.
Anyone who uses them consistently develops a better eye for shape, balance, and body structure over time.
Eventually, many of these checks become intuitive. Until then, guide lines are one of the simplest tools for catching and correcting typical mistakes early.
Jackie